FMP Critical Review

For my project I have looked at and researched into my nan and her past life that she has spent in Bermondsey. ~Looking how Bermondsey has aided her and how they have both grown up together by using the objects and the old photographs that I have found from her flat. These have helped me and my research into discovering her experiences of living in Bermondsey from a young age to her elderly age. Undertaking my Pecha Kucha slide show at the beginning of FMP I feel that I have done exactly what I stated, by using primary and secondary research and having the critical review from other peers. This really did help me to broaden my research by looking at my nan’s clothing, her routines, what she liked doing; this also really helped when it came to creating textiles and prints for my designs.

Going to different exhibitions that don’t really link with my project, but have a small connection, helped me to create more conceptual work that might not look obvious, but that I can relate to my theme. Each exhibition had something that I could develop to link to my nan, but it was the technique or the style that really helped. Another technique was using WGSN especially when first creating my customer profile. It helped me to acknowledge trends that where coming up, which aided me to then create trend boards. I therefore knew when it came to designing it would help me to develop what I found in my research into something new that I could take forward into my designs. Also using Instagram helped me to find my customer, using magazine pages such as ID and Love, and looking at the people that follow the page to get my customer. My customer has been the most important part of my FMP as without having a customer profile I would have found it difficult to develop concepts and idea’s for my final garment.

From my whole year of foundation I have developed a real strength for creating collages, which then helped me to progress and develop into designs. Using my nan’s figure from images that I found and then using other research, such as objects from her house or from books, I have collage them onto her form and then extract shapes, which I have developed further into designs. This has made it much clearer and assisted people ,when they see my sketchbook, to have a clear understanding of what I want to create and develop further. I also used a lot of CAD work, especially when it came to making my prints, it has been easier to put them onto CAD and then from there send them to prototyping so that I could test on different fabrics, but I would always have them on CAD first and also develop them on CAD.

When doing my first initial research I found that my nan did a lot of knitting when my mum was young. She would knit them scarves and jumpers when her children where really small. Now she wouldn’t know where to start ,but I wanted to bring that important part of her life back. It was a time where people didn’t have enough money so they used to make their own clothes especially for their children. I tried different techniques of knit creating a pattern using two colours which I had to problem solve a lot and I found really hard. I also linked my interest in making prints, which I wanted to combine with the knit, therefore testing print onto different types of yarn to see how well the pigment would come out. I further developed my print testing onto different materials to see how the pigment would show, one being onto acrylic, which I used laser cutting to create the shapes, and then printed on after which was successful. However, much of my problem solving came from the toiling when the crotch on the shorts where to big because the block was big so I had to work and find a way of reducing the size to fit my model.

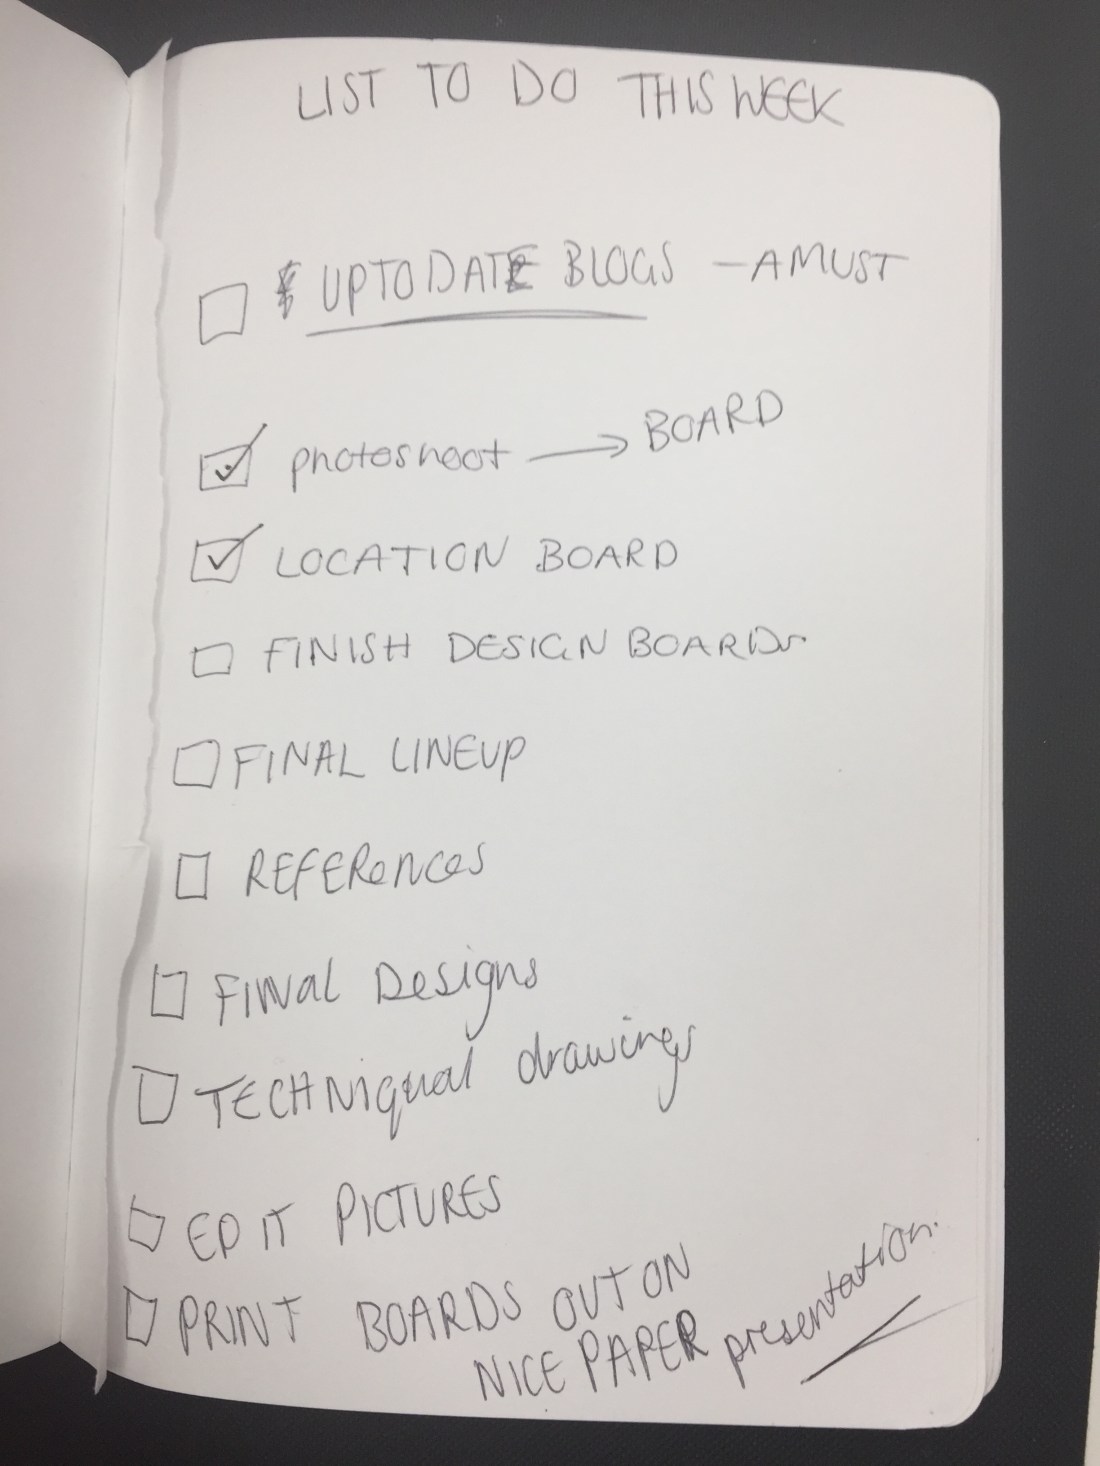
At the beginning of FMP I created a timetable in my proposal which I had when first started. This really helped me, especially in the first two weeks, when its just research, therefore knowing where I was and what I needed to do next really helped me. When I got closer to making the garment and finalising my boards and designs I made check lists of certain things that I needed to do and complete for that week. I found it better to do pen on paper because then I would always look at what I needed to do and I found that it would help with my stress. This also helped me when developing my work and not getting worked up and rushing it all. Although I created these lists, one thing that I have learnt from this is about managing my time better and really sticking to that timetable, especially at the end when it came to finalising my project.

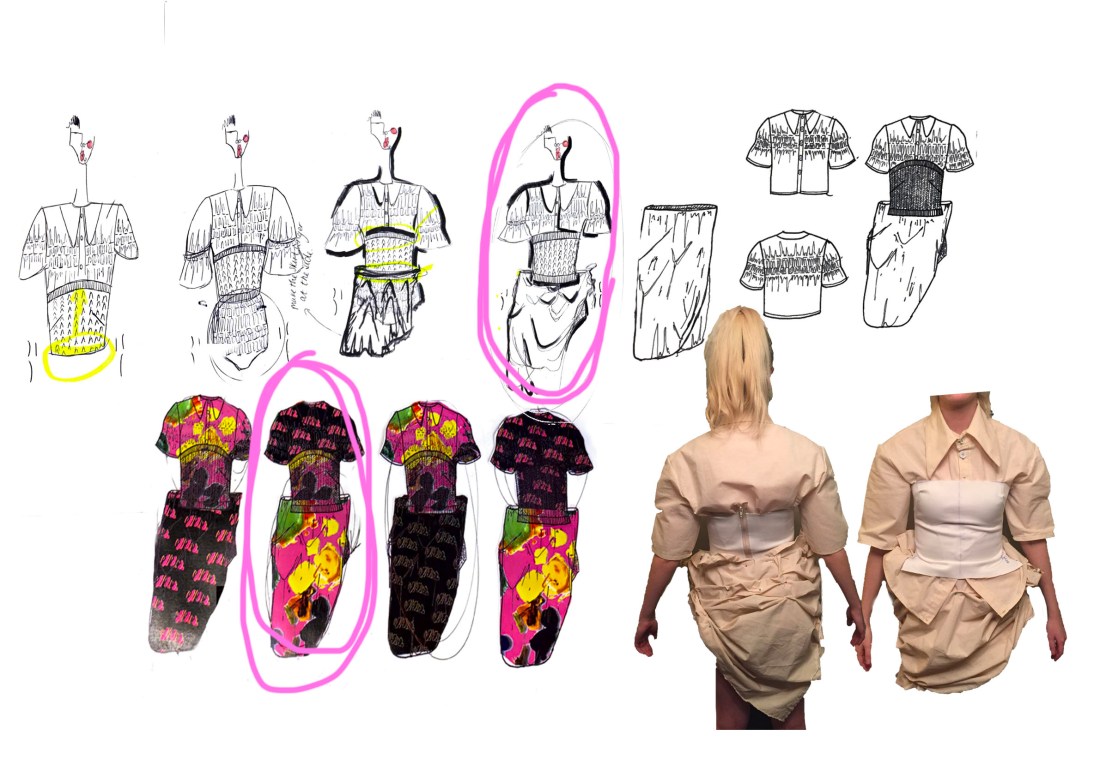
Whenever it came to designing I would create a board every time. This really helped when I got to a stage or a design that I wanted to develop further and wanted take forward. Making the boards  help when it came to finishing off the final designs. It helped to narrow it down so that I wouldn’t get confused with using other designs. Also by adding fabric samples, stand work and research it also reminded me where I originally got these ideas from and how maybe going back into that research and changing slight things to my drawings, could make the design better. Leaving annotations in my book, also what I liked and wish to take forward and what I didn’t, helped me to understand when looking back at work and finding further research and development. It really helps when creating design boards. Keeping up to date with my blogs and writing what I done in the week also helped me to evaluate my work and what I want to take on. This helped especially because you just focus on one thing, which makes you really go into detail about what you like, dislike and how it involves your customer and research.

To find my intended audience I mainly used Instagram by looking at some of the magazines such as ID and Love magazine. I then looked at the people who follow these brands which gave me a general understand of what my customer was going to be like. From this research I created a customer research board which technically sums up who’s my customer? Whats their name? What they do as a job? and how much they earn? and other information that would help me to understand what kind of person this is. From looking into WGSN, and the trends, I found that one of the trends was bringing back older patterns that where around when my nan was younger. I found this material throughout her flat, which I then wanted to take and revive combining with another trend such as block colours. Therefore using bold colours in my prints as seen on the picture of my customer board. Using shorts that are slightly sexy and younger, using knit in a different way to a jumper or a cardigan, new ideas that I feel would suit my customer.

From this experience I feel that I have developed substantially with my researching skills, not just skimming over things, but in-depth research. I have developed my problem solving from different experiences and asking people for help with ideas instead of just trying to do everything myself. From a research and development point of view I personally don’t think I would of done anything different. I feel that I have captured what I wanted to gain from my FMP, it has pushed me so much in the sense of trying harder things that at the beginning I would have been to scared to try. Embarking on my proposal with only one garment and then making four garments and two accessories came from the fact that I wanted to push myself and develop my skills. The only thing that I would develop is my time management and being a bit more organised and sticking to times when I want something to be done.


FMP Final Evaluation

From my whole journey through my FMP I feel that I used my skills that I have developed through developmental stage which has really allowed me to advance in an area and topic that I have enjoyed so much. I feel that I have learnt a lot more about my nan and the person that she used to be at a younger age from the old family photos and the furniture and wallpapers that she has in her flat. I feel that my research has expanded from what I was going to originally research when I first started my project and found new ways at looking at using objects in a fashion, conceptual way. I also wanted my project to be as sustainable friendly as possible, especially when creating for my final piece and my toile. When I needed to use knit for my toile I wanted to use that same material for my toile so that I knew what the top would look like and how I would fit it to the body. However, to save me money and to be more sustainably I went to the charity shop and brought a cardigan the same sort of thickness and stretch that I wanted to use in my final garment and used this to create the toile for my top. When creating the knit for my final piece I wanted to make sure that I didn’t waste any knit so I made sure that what I was going to knit on the machine was going to be the right size for the top which I really liked because then I didn’t have to cut the top or throw any yarn away that I didn’t use because I used all of it. However, for my final garment I did use polyester satin which is not sustainable and not good for the environment, in addition, I wanted my whole garment to be printed and synthetic materials are the best to print on because they have the most pigment, but by using a sublimation printer as a method of applying the colour to the fabric it doesn’t create water waste and polluted water. Overall I feel that this project has mainly pushed me to create more and to be more inventive with what I used, where I resource it from, looking at other ways of doing things and problem solving my way through, especially when creating my garment such as the skirt and making a shirt it has really pushed me to do these thing that I didn’t plan in my proposal at the beginning by having one garment to having four garments and two accessories.

FMP Studio Shoot

From my location shoot, I wanted to simple the image down, with the studio shoot using a plain white background. I wanted this shoot to be simple but still linking to my nan by using props. I wanted to use curtain props from my research and from the location photoshoot that I thought worked well such as the feather duster which I really like the hight of, its one of my nan’s oldest pieces as she had it before my mum. I wanted to use these props especially the feather duster to imply being a mum and living at home, the house chores that she would of done. Bringing that idea to the shoot is what I really wanted to capture. I also wanted to bring one of her small tables that she had in the flat, a tea cup and a washing basket to show the chores that she would of done. I feel that this shoot was more successful then the location shoot because it was a clearer view of the garment but it still had bits of nan’s flat in the shoot so it link to my research as well as clearer for the viewer. We also used the objects in weirder, conceptual ways which I feel links more to my customer of being younger and new positions which I really liked. By creating this board of positions it really helped me when I would show the model what I wanted her to do and she really worked well with the idea that I had and was a successful photoshoot.

This slideshow requires JavaScript.

FMP Shoot Location

location photoshoot board

For my location shoot I decided it to be at my nan’s flat where I would be able to capture the theme of time and have photos with her wallpaper and furniture and little ornaments in the back ground to show the old and new, old being the flat, the new being the updated garment. I wanted to use my nan’s flat because I thought it was quite editorial using old furniture which is what I considered for my customer. When I was researching for model positions I came across a lot of photographs with the use of furniture that was vintage, hence why I wanted to use my nan’s furniture. I wanted to use something from each of the rooms. From my research I found that a lot of the images where polaroids so I wanted to take some of the pictures with my polaroid that I have at home. When taking the pictures I absolutely loved the positioning especially the Polaroid pictures where my favourite with the natural colour that the polaroid added to the film. However, when I had my one to one with my tutor he liked the polaroids but the other images he didn’t like and thought that it was simple that I done it at my nan’s. I agree to a certain extent, I agree with the other images I didn’t like the colour in which the app on my phone was taking them and some of the rooms where really busy full of furniture and objects that you lose sight of the garment. However, I wanted my research and the photos to be clear that they connected with each other. I look at the objects and then I come back round and compare the objects that I used from my research and compare to the garment that I made showing time of old and new. It links with my customer because they like going to exhibitions and being immersed in the art, so taking the images in my nan’s flat immerses the viewer into my research and the journey of my nan’s past and present life in Bermondsey.


FMP List

Knowing that I’m coming to the end of my FMP I still have boards and other little pieces to do before hand in next week. I want to do another list just to check with where I’m at and so when I next have my one to one with my tutor he knows where I’m at. This is my list for the rest of the week. When doing this list I did realise that I did fall behind on blogs and on my design boards which I wish I had done earlier. If I was to do this FMP again to improve on my self or for next time when I start uni for my Degree is to be more organised with my boards and blogs and to really set a time in my day just to get these things done which would really help me out next time and would help with the stress as well. However, these are the things that I must think about for presentation especially my boards. Hopefully with this list it will help me to relieve my stress as I start ticking them off.

IMG_0062

FMP Accessories For Garment

To finalise my look when I was researching my nan and looking at what she has in her flat I found an occurrence of pop socks laying around her flat as she wears them all time and then my mum told me that she used to wear a head scarf when she was younger especially when she went out. When I was researching my mum told me that she threw them all out when she got older which is quite ironic as we always picture them on older people and the idea of me bringing them back just shows me renewing clothing and creating something new that will meet with my customer. After testing on pop socks with the same pink with the pink paint and the same with the head scarf. The pop socks came out successfully however when I stretched them they did lose a bit of colour from when I first printed on them. But when seeing on my feet you could still see the pattern and shapes but just not as bold. I actually quite like that they aren’t as bold because I feel that I would be to much. When it came to the head scarf printing I made the mistake of printing it on the heat press when the print was larger then the machine which left me with white line across my print. I had to come up with something that will cover these lines so I used similar parts of the print and replaced the lines. However, not all the lines where gone so when I fold the head scarf into a triangle I have to make sure that the lines go against the head so that you don’t see them. In a way its kind of good because then I know where to fold it and looks perfect because then you can’t see the bottom part of the scarf. If I was to do it again I would of done it on the roller instead of the heat press especially when the print is bigger then the machine.

FMP Making My Garment

When creating my garment, especially the printing I wasn’t as nervous to create as I knew exactly what I was doing as from the testing of the fabrics before I knew that the pigment would be successful and making the garment from my toile’s such as the problem solving I have already resolved. The main thing that I was really worried about was the knit for the top that I wanted to create and the ruching on the shirt. For the knit I was worried because I came across the mistake of undermining the stretch in the knit that I had created. It was a lot more stretchy and heavy then the knit that I had used to make my toile so I had to fit it around my own body with the help of my mum. Having two pieces the back and the front I clipped and finally pinned how tight I wanted the knit to be on me. I wanted the knit to be tight so I thought that it would be best to place in the zip first and then try on and pin it so I could see exactly how tight it was going to be. As the knit was so stretchy I didn’t need to put darts in as it fitted around the curves of the body, fine. With the print I was worried that if you stretched it to much that you would be able to see the white knit underneath but you couldn’t. For the shirt, when I made my toile I made it out of calico because I wanted to see the silhouette and the measurements of the shirt how big it was going to be. I knew the success of the ruching as I tried it on a light fabric before. I had to make sure that each of the measurements between each line of ruching was the same so that when the ruching brought the shirt in and upwards that it would still be the same length at the bottom of the shirt and in the sleeves. Having this trouble with the shorts on my first toile but having problem solved it with the second pair I was quite confident that it will be okay. Another problem that I faced was sewing in the sticks onto the skirt. Having used calico before it was quite easy for the fabric to stand in place, whereas using a polyester satin its a more slippery fabric which is hard to keep in place. Having to keep the fabric still with the pins and making it work with the sewing machine I had to have the needle at the side at the beginning but soon realised that the needle was going off the edge of the folded fabric so I had to move it to the centre so that it could still sew the folded edge of the fabric. The sticks where also very hard to hold so I had to have my mum feeding it through while I was so sewing which was a challenge in itself. However, I really loved the overall look of the garment, I made sure that the garments look finished professionally and that every detail was shown. If I was to do it again differently I would make sure that I have more wool with me because when I was knitting I didn’t have enough and it kept coming off the needles leaving me to add on the extra part so there is a line in the back. Also with the extra yarn I could of finished off the top part of the back.


garment progress


FMP Final Design Board

For my final board I just want to make it clear to me and other people who look at my sketchbook, what I want to take forward as well as the design that I want to make with the print and print placement with the technical drawing and the toile of what it will look like as finished garment. By placing my developments on the board it makes it clear to my viewer where I have finalised my designs and circling them so that I know for my self that these are the designs that I want to take on further. Making this board also helps me, its almost like a check list as it needs to shows everything that I want to take on, that I have a clear understanding and that I make sure that it links to my customer and that its clear that it connects to my research. Although the layout of the board isn’t how I usually do it, I want to make this board more simple and clear to what I was actually doing thinking about presentation and how my viewer would consider this board. After receiving feedback from one of my peers she said that I had good experimentation on the board and testing showing trial and error, however to develop this I could add fabric swatches to the board so that my customer knows exactly what fabrics I am taking forward which I will know from my testing of different fabrics. With this critical feedback I can add the swatches onto the bards after I have printed them out so that the viewer can touch them.

design board 6

FMP Toile 2

This was the toile that I was nervous to do. I figured the first thing to concentrate was to think about how the skirt is going to stick out at the side. I asked a fellow student what they thought I could do and one of them said boning but I wasn’t quite sure how that was going to stay up on the hips and the garment. Another said to use sticks and to bend them around the body so that it curved to fit to the body and stood out. I figured by using two sticks that where bendy but just a bit and tided them together to create the length that I wanted them to stick out at the sides because thats where I would tie them. taking on this idea really helped me with a starting point although it might not happen I wanted to try it because it might help to then develop another idea. Using sticks that I found in the woods that where quite thick and bendy but not as heavy so that they would fall down off the hips. Then chopping down to same size and tying with string and leaving it on my mannequin so that it stays in shape so that I take it off the mannequin and it will stay in shape for me to put the fabric on. When taking the sticks off it was perfect, they stayed in shape. I tested by putting them back on the mannequin and fitted perfectly knowing that I was a similar size to the model so I tried it on and it fitted really well and tight so that I knew that it wouldn’t fall down. Also thinking that I would also have the shirt underneath which it will also help to keep up. Adding the fabric was the easy part, folding over the fabric at the top of the skirt so that the sticks can slide through the seam and then just draping it to the shape that I wanted first using calico then using a light fabric so that I knew the effects of how the fabric was going to shape when draping it and pulling it upwards. I realised however, that when I tried it was the light fabric that I used a lot more fabric where as with the calico I only used a metre which is what I preferred as it was easier to take up at the side and I feel created a nicer shape. I wanted to be also shorter because the lamps in my nan’s flat where I got the inspiration for the garment where quite small lamps so I thought it was better to make it smaller.

sticks


FMP Creating My Toile

Having my final design and technical drawings with me and finished, I was ready to create my toile. Im not the best at making in general but I have a general knowledge of how to put a garment together. I had some help when it came to making the shirt and shorts as I got the pattern blocks from my neighbour who used to make clothes for her self but making them I did myself. I new that there was going to be some problem solving involved especially when it came to the skirt. The shirt was quite simple as I have made a shirt for the industry project but the hardest was the collar and lining them together I really struggled with, a lot of unpicking but I found that if I placed the pins downwards instead of across then I would be able to sew over them without the shirt moving.

shirt


The shorts where quite easy until I came to adjusting the pattern block as a I found the the crotch was to big when I tried it on me. Luckily I found that the models size and my size was very similar so it was ideal when it come to fitting and adjusting the garment when trying it on. Having to test the pattern block and make two toile shorts just to test the shape of the shorts. I also had to consider the ruching on the shorts as it decreases the size and I didn’t want it to stretch to much that the ruching would loose it shape. So I had to test the length in which I was going to have the shorts and not make it to big that they would fall down. The second pair was successful and fitted perfectly. As I was going to use polyester satin I wanted to use a light wight material so that I could see the ruching and how it effects the shorts. I decided to use interfacing because its light and easy to work with.


Then for the smaller top, I wanted to use knit. Knit being so stretchy I wanted to use a cheaper knit in my toile to see and test with what I was working with. Going to a charity shop and getting a cardigan with the similar consistency as the knit that I wanted to use just to test the stretch in the fabric which will make it easier for me when creating the final piece. I thought that working with the knit was really easy and just stretch around the mannequin really easily. Although I had to put some darts in maybe because I did use a cardigan really did help me to know where I wanted to put them so that I could take it to the block and use when I use the final knit. To make sure that the pattern block worked I wanted to test onto just a plain fabric with a bit more strength so that I could see clearly the shape and if the darts worked. Using a plain fabric helped me to work it to the stand adding notes to the top showing the centre front and where the darts where going to be and where I wanted to cut which really helped me to finalise my pattern block. However, when attaching the zip to the back I found that the zip was to long and that was the smallest zip that they had in the shop so I needed to change the length of the back. Before using the knit I did create a paper top using block paper to test the shape of how I wanted the top look like with out wasting any fabrics. I really liked this idea because I knew exactly the shape that I wanted to achieve.

top toile